Lessons learnt: A word from the expert

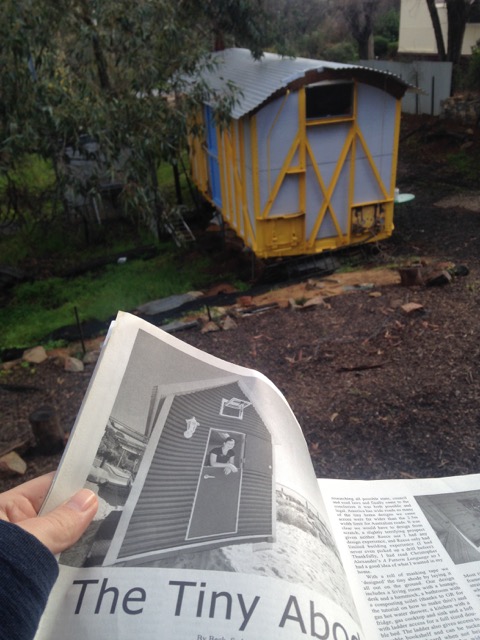
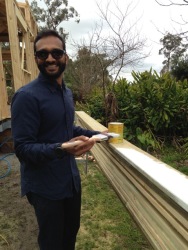
Introducing…the infamous Tom!

It seemed only fair given the amount of blogging I’ve been doing about Tom that he got his chance to contribute as well. I remember mentioning that lots of tiny housers write articles that list the ‘Three things we’d do differently next time’ or the ‘Five biggest mistakes I made when building my Tiny’, and that maybe we should’ve been keeping a list, ha! Lucky Wonder-Tom to the rescue offered to write about some of the technical issues we’ve encountered and his perspective on things more generally. Thank you, Tom! x

IMG_8266 (1)

After 8 years of constructing my own designs and working on my lonesome I have developed a building style which I describe as ‘flexible’. Other members of our building duo prefer words like ‘ad-hock’ and ‘worrying’, unbelievers.* The truth is, as with all constructions, this has been a balance between meticulous pre-design and haphazard spontaneity. Tiny Friday planning meetings were a great start to this project, but pizza and beer have their limits, so we started building. Here’s my hap-hazard assessment of our efforts so far:

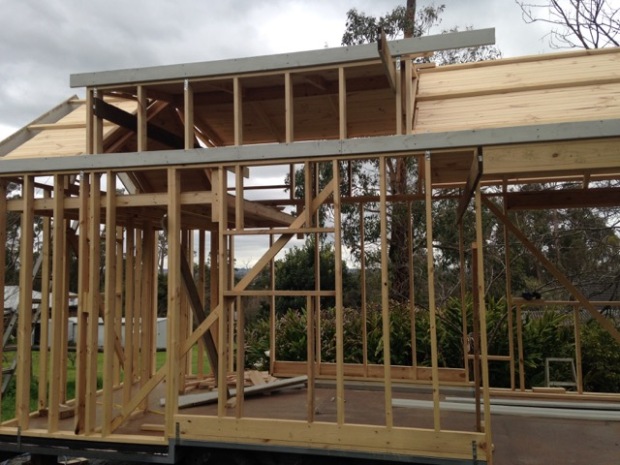
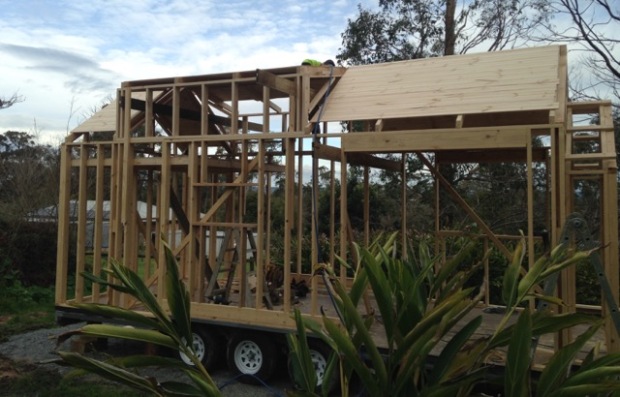
The build has been slick, in 6 days of building, the roof is on and the house is wrapped. Construction speed is much underrated. In slow motion your materials will deteriorate, inspiration passes, supporters wander (literally) and your friendly neighbourhood carpenter swaps a winter lull for a spring rush.

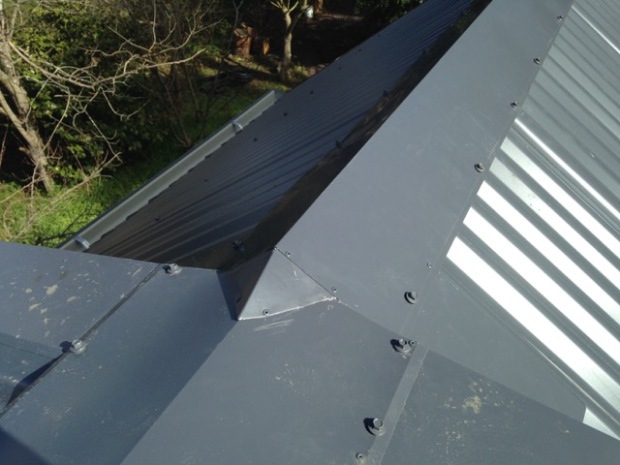
The consequences of our speed are real, but manageable. There is some tricky noggin work (still to be done), some colour choice stress (not mine), some minor framing rearrangements (gable nook) and some minor geometry errors (see ridge cap photos).

IMG_8411

So far, I wouldn’t change much at all, should I remake this design. I certainly would not change what has been a relatively low level of planning in exchange for a speedy build. (I wasn’t involved with ordering the trailer, saving pennies, scavenging for windows, or filling an entire scrapbook with miniature roof-line sketches).

A small wish list of minor changes:

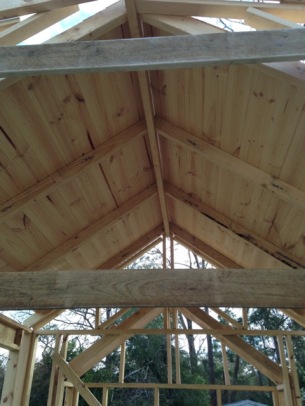
  • Raise the dormer rafters and battens to simplify the ridge capping, if you are interested in this, check out the diagrams below of how I wish I had done it.
  • Add a central collar tie, there is still time to do this as the temporary collar ties are still up. I was hoping to avoid collar ties all together as the change in roof line acts as its own support, however, for piece of mind I’ll be putting one in, more hanging space.
  • More time planning the nook-gable and ceiling line. The gable roof on top of the nook was a late addition, so too was the exposed roof-line within it, in another life time I will be more prepared and be able to match it in with the main cathedral ceiling a little better.
  • Better estimation of sisalation, roof screws and paint. Having said that, “those who never made a mistake, never made anything”.

IMG_8412

On the plus side:

  • Material waste borders on microscopic
  • Did I mention speed?
  • Exposed rafters with pine lining is a winner.
  • Single-fold ridge cap is a great alternative to traditional roll-top ridge, must be ordered to your specific pitch and must be 5 degrees more acute than calculated.
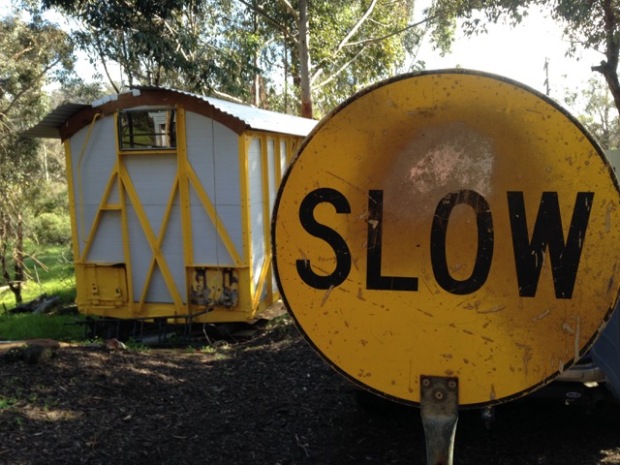
  • It’s working! It’s not so Tiny on the inside, it’s funky, fun, affordable and I’m totally stoked with how the Blue Tiny is looking from the outside.

unnamed

With lots of work still to go, the ‘error’ column remains open but it has indeed been a smooth start.

gable

roof

*Note: Exact wording used was closer to ‘terrifying’ and ‘Tom, you balancing up there with your circular saw running is kinda giving me nightmares, please don’t fall off the roof.’

IMG_8296

That’s a wrap!

Back to sunshine and group slave labour – the roof, gutters and house wrap are on!

IMG_8431

Once I’d made the hard decision of choosing the colour, Tom ordered the roof, gutters and flashings. Being one of the more technical jobs we mostly left this bit up to his expertise, but not before cutting the roof insulation to size and giving the fascia boards another lick of paint. Gutter prong holdy things went on (technical term), then the gutters and then the roof was on! Tom is going to report back on the roof side of things soon for a more detailed overview of what he’d rethink if we tackled this project again.

IMG_8381  IMG_8390

There are still a few things that we are making up as we go along, they usually turn out to be decisions made mostly by common sense anyway. The downpipes for example, are all running towards the drawbar end of my trailer. This means my rainwater tank will be able to sit on the drawbar in front of my gabled nook: makes sense. Yet for some reason I was picturing a tank sitting out the ‘back’ of the trailer so it’s not the first thing you see when you approach the house. It’s a little thing but it’s these details that you may not have considered before that can catch you by surprise. There still hasn’t been anything that has been a major issue, but maybe that’s also the ‘going with the flow’ approach kicking in there.

IMG_8454  IMG_8456

Brodie came to lend a hand ALL WEEKEND and is a giant tiny house star. Once the group effort of getting the bulk of the roof on was done and Tom was busy fiddling around with flashings, Brods and I got to work putting the vapour barrier on the rest of the house. The sisolation (also known as sarking apparently, what a word!) protects the house from moisture and condensation (I think?!). Just one more task that I underestimated…turns out everything is made that much harder when you’re metres off the ground! Pretty sure I’ve now earned my ladder badge – setting up, shifting around, balancing on uneven ground and then climbing up and down – all seems pretty straight forward but the proper heavy duty ladders take a bit of wrangling and sloping, muddy ground doesn’t make for the easiest set up. Also they’re HEAVY. Hoping my tradie muscles show up soon. Must be on their way, right?

IMG_8405

Anyway, Brodie and I, exceptional apprentices that we are, made considerable progress on the sarking. Considerable that is, until we ran out of wrap. No biggie; quick duck off to the hardware shop to get some more. We got another side of the house covered and then promptly ran out of tape to tape the wrap. (Meanwhile, who doesn’t buy more tape when they buy more wrap, just in case?) Another trip to the shop. We got seven eighths of the way finished annnnnd then ran out of wrap once more, just for good measure. At least I’d genuinely considered getting more wrap while buying the second lot of tape? I was pretty sure we’d be swimming in left overs of the wrap but, there you go. Bit awkward now – anyone have a spare 2 metres of house wrap I can scrounge?! Lucky Dad’s old tarps were still on hand from my attempts to protect the yellow tongue flooring on the trailer. We tacked a smaller one on and now have the bulk of the house covered.

IMG_8430

One other fairly major mistake we made was taking the scaffolding down before wrapping the dormers. Once the gutters were on the bottom half of the walls were wrapped it was pretty impossible to rest a ladder anywhere convenient. Brodie and I got desperate creative and wrapped from the inside as best we could but it wasn’t pretty. It will either be fine once the cladding is on anyway, or we’ll redo it once we’re set up to clad and can reach. We used tacks you hammer in and impermeable sarking, not the breathable stuff that you can get for the walls – it’s heavier duty and I’m not quite sure why you’d want your moisture barrier to be breathable anyway.

Thank goodness we got the roof and wrap on that we did – the week following we had a massive dump of rain and things continue to be wet. It also made it a lot easier to pack up and head to Perth, knowing that the house was pretty well protected. There are still a few gaps to fill but with a roof and wrap on it should last a few more weekends till the cladding arrives. More big decisions on their way…stay tuned!

IMG_8464

Serendipity; a moment for reflection

I flew over to WA on Friday night for a week and a bit, two whole weekends away from the build! It has been unreal seeing things unfold but working full time, trying to plan out the next steps for the house and then travelling home to build every weekend has also been a bit exhausting. I think more than anything it has been emotionally tiring – this whole thing is a total mix of extreme and intense feelings; often from excitement to anxiety within a few short heart beats. Don’t get me wrong; it’s overwhelmingly positive, but even then it is just that – overwhelming. There hasn’t been much down time for processing in the past few months.

Now I’m here for a work conference and took a weekend either side to see the sights – WA is the final frontier of Australian states for me – I can now officially say I’ve been to every state in Aus! Not sure it counts if you only see the smallest fraction of that state, but it’s a start. This weekend just gone was EXACTLY what I needed to recharge, and I definitely feel like the universe is on my side at the moment. When things fall so easily into place that’s usually a good sign that you are exactly where you’re meant to be.

I’m staying here with my friend Fi, who is a total treat. We met years ago in Tonga but never got to know each other until well after – such an incredible woman. I know this isn’t directly related to the tiny house, but actually it sort of is. Everything sort of is. Finding people who live intentionally and without fear, who strive to be their best selves and to be comfortable with that person is just one more unanticipated reward of delving into this tiny house world. Working out how to be one of them is an ongoing lesson that, for me, is embodied in this project.

Being connected with the right people is a huge part of the lesson. When I was living at home in the country surrounded by people who had never really left our hometown, had all settled down to buy a house, get married and have kids, there were moments where it crossed my mind that perhaps I should’ve been aiming for those things too. Around my 25th birthday I had a mini quarter life crisis (yes, the maths is correct) and a proper talking to myself. I had to ask: ‘Do you want to settle for these things now and compromise on everything else you want, or keep following the path you’re on and risk not getting what everyone else has?’ I think now I’d rephrase that question into something more along the lines of ‘risk ending up somewhere that not everyone does’, but in any case it’s less of a challenge for me now. I work with smart, independent, well accomplished women.I have the most adventurous, interesting and caring friends, and I have the luxury to choose where to go next in life and what that looks like. The absolute luxury of being able to take a risk and knowing I’ll be ok if it doesn’t turn out the way I plan. Hanging out with someone like Fi, who has travelled the world, invests time and energy in being content and intentional, who is knowledgeable and open and grateful and calm, helps reset the bench mark of what to aim for. Or rather, who to aim for. Less of having, more of being and doing. Always.

Total digression. See? This is what my brain doesn’t have time for when I’m busy fulfilling my apprentice duties. It’s nice to slow down and let my thoughts wander and regroup.

So this weekend Fi took me for a country weekend getaway in Boddington, about 100kms out of Perth. Basically, the WA equivalent of Gippsland, haha! Lots of sheep, rolling green hills (thanks to a very wet winter), just a few hundred extra Xanthorrhoea Preissii to admire. We stayed at Fi’s friend’s home made, DIY, country house – complete with a compost toilet, wood fire stove outdoor bath and a TINY RAILWAY CARRIAGE HOUSE out the back. The house was creative, cosy, minimal, and an absolute throw back to the shack that started it all for me back in 2014. There were even owner builder magazines in the corner and of course one had a tiny house feature article from a few years ago!

IMG_8564

It was too strange to be coincidence and it reset some of the excitement of what’s coming for my house without the worry of figuring it all out just yet. We walked all weekend despite the very Victorian weather and bushwalking with a botanist (just one more of Fi’s many skills) is a surefire way to open anyone’s eyes and shut up a busy brain.

IMG_8589

The whole weekend was just a perfect reminder that these aren’t new ideas and it’s not a new lifestyle. It’s a way to take a step back from the wild over-consumption and disconnection that is becoming more and more common. It’s not so scary when you remember that it’s mostly just common sense.

Treading gently, slowing down, being grateful, recognising that we’re only here for a moment. Sometimes we lose sight of these things without noticing, they blur into the background. Thankfully, it only takes a second to pause and remember.
IMG_8586

Appearances matter

So with the fascia on, it was crunch time…choosing colours! Tom gave me approximately 24 hours to choose the colour for my roof and couldn’t seem to understand THE. PRESSURE. involved. I’ve already established that I’m going for Colourbond on the roof at least, so that narrows it down to the range of Colourbond colours. There’s a start. I have collected a few ideas to guide me in the ‘look’ I want, but translating that into practical decisions proved a little harder than google searching.

98f59e5d3068ae68e8ec8d8253a95f98  cladding  947e73901b6b870f54c8f164586a1be5

Basically I love this style, but I also don’t know how I feel about such a dark colour on the outside. I love the tin but I’m worried about weight and combining too many elements and ending up with a busy, hodge-podge look. I really like the red windows but I’ve also chosen all timber windows and doors for a natural look and feel. I really love the miner’s cottage bullnose verandah and classic Aussie character but somehow I’m not sure Tom would entertain the idea of helping me fit one of those in somewhere. Can you see what I’m up against?

Finding a look you like is one thing, but it gets complicated when you have to factor in weight limits and practical elements as well. I had originally thought about putting Colourbond on the outside as cladding as well but have since decided it might end up looking like a tiny shed. Now I have such lovely gables on my roof it only seems right to try and make the rest of the house look just as nice! Tom got me onto the idea of profiled cladding, sheets of ply that look like weather boards or timber. It’s strong, easy (and a lot quicker) to install and hopefully light enough too. It’s a bit crazy how much different products can vary in weight, anywhere from close to 20kgs/mdown to my front runner at the moment, Shadowclad, which comes in at 6.6kgs/m2. I’ve calculated roughly 52 mof outside wall space to cover and with a total weight allowance of 3200kgs, the 350kgs of cladding is a surprising portion of that. This will be added to the roof (200kgs?), the timber frame, the inside lining, my giant double glazed glass doors, my cast iron combustion oven (120kgs), plus about a million things I haven’t even considered yet…it adds up quickly. Gulp.

Shadowclad-Groove-Natural   9036de26008be739b02d481055d44a4d

One worry was that the Shadowclad only comes with vertical grooves and it seems semi unusual for tiny houses to have vertical cladding according to my near constant scrutiny via google. I was slightly worried that maybe the traditional gable old fashioned style roof wouldn’t match up with vertical boards (probably a silly worry, but you just never know these things right?!). As seems to be happening lately, the universe provides and last night’s Grand Designs featured an American Gothic style house – very traditional gables with, you guessed it, straight up and down cladding! I doubt I’ll commit to the style much more than that (possibly some lacy bits under my eaves?) but it went a long way to reassure me that it wouldn’t look ridiculous.

Anyway, back to the point: after extensive deliberation (read stressing out) I managed to settle on Ironstone for my roof. It was a toss up between Monument (too dark), Deep Ocean (too blue) and the middle ground of Ironstone (seems obvious now, right?).

Another tiny step forward. Breathe. Readjust. Next?

Considering one element of this project at a time is genuinely the only way I have found enough brain space and capacity to tackle it. I suppose that’s the saying though right, how do you eat an elephant? (Actually that’s a bit of an awful analogy. Who would want to eat an elephant?!) But you get the point.

Shout out here to my TH project manager buddy, Brodie – your endless patience and sensible advice are saving more than just my sanity I’m sure! 😉 Thank you xx

Visitors!

IMG_8341Up next comes the fascia – this is pretty much the edging that runs underneath the gutters and covers the join between the roof and the outside cladding on the walls. Right? Something like that.

My fascia is rough sawn treated pine boards that we painted with outdoor paint. For the paint and the boards all up it came close to about $100, which isn’t bad for a part of the build I didn’t even know existed before we started. Plus visitors always help! Thanks Sanksee 🙂

Tom cheated a bit here and whacked the boards up before cutting them to size. I suppose you’re allowed to cut corners when you literally can cut corners with a circular saw on a ladder. Much quicker than calculating and measuring meticulously like the rest of us would have to do!

IMG_8345

We also set up some scaffolding for the next step: THE ROOF! Noel borrowed the alloy scaffold planks from his work site (super handy!) and Tom whacked the timber frame bits up from left overs and some extra non structural pieces we had lying around. This should make getting the roof on a bit easier, especially given the awkward angles of the slope on either side of the house. Ladders ain’t so much fun when they’re wobbling underneath you…

IMG_8363  IMG_8365

IMG_8360   IMG_8353

Pine lining and exposed rafters

Disclaimer: in case you haven’t worked it out yet I’m not exactly up to date with these blog posts. If you notice any inconsistencies in how many Sundays I’m mentioning within the period of this week, that’s why. Lots of time building and trying to make decisions means less time for writing about it all. But, on with it!

IMG_8313

During my chats with Tom, the idea of exposed roof rafters has come up a few times. I love the idea – who doesn’t? Brings to mind glorious wooden beams stained with character and history, bit fancy really. Personally, I’ve opted for pine lining tongue and groove boards for the ceiling, which will sit above my 90x45mm pine rafters. Not exactly majestic barn rafters made of oak or anything quite so Grand Designs-y, but since my introduction to pine lining at the Hollyburton workshop I’ve been pretty sold on the idea. I had originally planned to do the floor with something similar but now that we’ve used yellow tongue ply it will probably be cheaper, lighter and easier to whack some laminate boards on the top later.

I do realise that most tiny housers have all of these design things worked out and lined up before they start but I’m not too stressed about the ad-hoc nature of things at the moment. I think not starting with a specific picture of how things need to be is often the best way to go. There’s far less room for disappointment if you don’t start with fixed expectations, right? It’s also getting to the point where I’m tempted to stop looking at the pictures of these gorgeous and ridiculously well planned out tinies floating all around the interwebs. Now that my build has progressed to a point that I can’t just switch my bathroom around or extend the space for my kitchen bench it’s becoming more a case of, ‘Oh, maybe I should’ve done things like that?!’ instead of the dreaming stage where it was much closer to, ‘Oh yes I’ll make a mental note of this amazing feature, I’m SURE I can have all the best parts from ALL of these houses crammed into my 18 square metres, no problem!’ Second guessing yourself at this point in the game isn’t much fun – I’m doing my best to keep away from any grass is greener kind of inclinations. My tiny is what it is and will be just right for me. And if not I’ll work around it. Or build another one. KIDDING! (Mostly).

Anyway, keeping the roof rafters exposed just meant applying the lining on the topside, rather then the underside of the ceiling. The pine looks and smells and feels amazing. Definitely one of those heart fluttering moments to see it go up. Suddenly, there’s a ceiling up there! Over my head! The space keeps changing dramatically as things progress. Sometimes it expands and I high five myself and strut around my luxurious 18 square metres, sure I’ll never fill it all! Sometimes it shrinks down to a conservative 18 square metres and my brain starts to wonder whether my Mum was right and I should’ve maybe tried living in a caravan or actually testing this tiny living thing out before I jumped face first into this swampy adventure….

Nah. Maybe. Oh well! Too late for that. Look at my rafters!

IMG_8300

IMG_8301 IMG_8305

There are some things I would reconsider next time before going for the exposed rafters – firstly we got the lining up on Sunday and it had to sit out in the weather for a week. And when I say weather, I mean pouring rain, thunderstorms and gale force wind. And when I say lining I mean not really meant to be exposed to any weather – let alone that sort of weather. More than a few restless nights were spent worrying about buckled and stained boards! Thankfully when I checked last weekend they were fine, there’s no obvious signs of any discolouration or warping. Secondly, putting the lining on before the electrician has come in may cause some headaches when it comes to wiring the roof. I’m just working on the assumption that we’ll be able to work around that problem when it comes to it for now. I may have to rethink the kind of lights I use, but again, no fixed expectations are helping with the problem solving as we go.

IMG_8314 (1)

The rafters will need a little TLC once I get to the inside, some sanding and possibly some polish, we’ll see what it looks like when I get to it. Despite some of these prickly details, the lining is on! And it looks amazing. And did I mention the smell? Mmmm…piney. Getting closer and closer to being some kind of inhabitable dwelling. EEK!

Some darn fine grass when you think about it, really.

youcantbeserious.com_.au-grassgreener-21