Tiny hot water: the details

Ok this isn’t a for dummies post, these are the nitty gritty details of my hot water set up and what I’ll actually be using after all this research.16
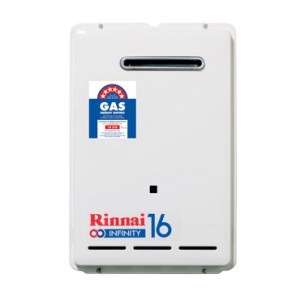
For all the reasons previously listed, I decided in the end that my hot water jacket, as romantic and appealing as it was, just wasn’t practical. Instead, I’ve opted for an instant gas hot water heater that will run from an LPG gas bottle. The model I’m going with is the Rinnai 16 , on the recommendation of my local solar and gas supplier. During my research I picked a few options, and mapped them out as follows:

Brand/Model Gas usage Equivalent Cost Pressure Details 
Joolca – shower head only 6L p/m, 28 Mj/H $20 per bottle $299 45 kPa
Bosch Ci10 10L p/m, 79 Mj/H 5.5 hours $850 50kPa inlet (100kPa constant pressure for max flow) requires vertical flueing, no power, internal installation
Rinnai Hotflo 10 10L p/m, 76 Mj/H $750 120Kpa min for max flow
Bosch 10P 10L p/m, 82 Mj/h 5.37 hours $750 55 kpa min constant for max flow external, no power, gas pilot light
Bosch 10H 10L p/m, 79 Mj/H $839 60 kpa min constant external, no power or pilot, hydropower
Rinnai Infinity 16 16/20L p/m, 13.8/125 Mj/H $750 120 kpa external, electric pilot light

The most important calculations and terms to understand here were the gas usage and the pressure requirements.

Gas usage

This is calculated in Megajoules per hour and needs converting to your relevant mode of usage. There are some useful conversion tables online and I worked out that if I’m running the hot water from a standard (BBQ size) 9kg LPG gas bottle, I’ll have about 441 Mj per tank. The Mj/h rate is a good starting point but also hard to make an accurate decision from. When I spoke to the guy from the solar and gas shop he explained that although the Rinnai has a higher max Mj/h rate, it’s also much more efficient at heating the water and so would use less gas overall to heat more of it. There are also star ratings for most models and this is a good indicator to go by apparently.

Details

The details are worth considering too. Do you need the heater to be installed internally? If so, will flueing the heater be a problem? Can it be installed externally? What sort of pilot light system will it use? Originally I had thought gas to reduce the burden on my solar system, but this means the pilot light is always lit and would be wasting a substantial amount of gas. Hydropower is another appealing option – this uses a mechanical wheel to generate the energy for the pilot light – no gas or electricity needed! I was pretty sold on the idea until I started reading some reviews online and was a bit turned off (it seems there have been quite a few problems with the mechanics in these models). I checked with my local retailer to see if he’d experienced problems as well and that’s when he turned me from the smaller Bosch system to the slightly larger (although apparently more efficient) Rinnai. The Rinnai does use electricity to spark the pilot light but I was assured this is only a tiny draw on the solar system. My solar guy agreed that it wouldn’t impact the amount of energy required but pointed out an interesting side note: the tiny draw of the pilot light may not be enough to kick my solar inverter out of sleep mode. Basically if the hot water doesn’t seem to be working, I need to go and switch on a light, ha! No hot showers in the dark for me.

Pressure

Pressure is measured in kpa (kilo-pascal) and psi (pound-force per square inch). Instant gas heaters require a minimum amount of pressure to work properly. I did consider the option of a gravity fed water system (just standing my water tank up higher than the taps and letting gravity do its thang), but without the pressure of mains water or a pump, these heaters aren’t going to work. So this brings me to the next step in the game: water pumps.

Water Pumps and Pressure Tanks

Due to the minimum required pressure of my heater, I need a water pump from my rainwater tank. To start with, I found a nice little popular 12 volt option, the Shurflo 4009. Pretty cheap but a good brand, has good reviews, doesn’t draw much power from the system and all in all seems like a good choice! If you’re running your pump on 12 volt power. Which I’m not. Power is a whole different kettle of fish that I haven’t touched yet, but I’ll get there eventually. Enough to say for now, that all of my power points are running on standard 240 volt AC power, and my pump needs to suit that system.

download-1To find a 240v pump that isn’t big or noisy and doesn’t draw huge amounts of power took a fair bit of digging. I eventually settled on a Grundfos CMB 1-36. Apparently Grundfos are a top of the range brand, are pretty quiet when running and have the lowest energy consumption I could find at 240v. The downside is that you pay for it. I’ll come to cost in a second. The other thing to keep in mind about pumps is that most of them will run constantly when your taps are turned on. This is pretty inefficient energy wise and doesn’t work well on a solar system.

Pressure tanks are a good way around the constant pressure problem, allowing you to use a certain amount of pressurised water before the pump kicks in and refills the tank. This means you can run your taps in small bursts and even maybe flush the loo (if you have one) a few times before the pump starts up. This is important because the pump can use up to seven times the amount of energy to start up as it does to run – it’s sensible to start it as seldom as possible and make the most of it while its running. I opted for a 30 litre pressure tank, which will connect to the pump and lets me use about 20 litres before the pump needs to activate. This should cover most of my day to day usage, except showering.

The Grundfos CMB1-36 doesn’t come with a pressure switch (to turn it on and off when the tank is full or empty) but my very handy local salesman said that wasn’t an issue. He rewired the thing for me then and there and added a switch on! I’m so glad I went into the shop and spoke to someone instead of just ordering the unit online. I highly recommend using the expertise and knowledge of people who work in the field, you can google and guess and figure out so much but there’s still so much to miss! Plus the price was pretty much the same in the store as online.

*

All in all though, with my $600 pump (youch!), $230 pressure tank, all the fittings and gidgets that went along with the two, the bill came close to $900. That’s just the pump and the tank, not including the heater! There are cheaper options I’m sure, but I’m aiming for quality and a highly functional and effective system. Hopefully that’s what I’ll have! I did ask the salesman if he had any other recommendations and felt quietly chuffed when he had a think and told me I’d picked the best one for my needs. Validation! Gotta love it.

My tank arrived as well on the weekend and even I had to giggle a little. It’s…well, tiny! Puny even. It’s hard to imagine what 600 litres looks like until it turns up on your doorstep, but here it is! I have no idea if it’s going to work or not be anywhere enough water to function with but I suppose there’s only one way to find out.
img_9460

Plus if I get desperate there’s always the garden hose.

All in all it was a decent chunk out of the budget for all the plumbing materials (I picked up the flue for my stove as well, there’s another $700 for the flue kit and the elbow bends) and I haven’t even started paying the actual plumber yet! But I’m feeling pretty great about it all. They were big tricky decisions that took lots of deliberating. In the end the best advice came, unsurprisingly, from the experts. Having a good idea of what I needed and wanted and a basic understanding of all the elements involved to start with went a very long way.

The hot water system and pump won’t be active until the power is set up, that might still be another month or so away yet. But having my tank and downpipes set up to at least start catching this never ending spring rain would be nice! The grey water system will be the next challenge to tackle once the power is all bedded down I think. Still some thinking to do around that end of the operation.

Ok folks, I hope your brains as are drenched in plumbing knowledge as mine now, cos that’s all I’ve got so far. Look at us dummies go! x

Dummies guide to: Solar Hot water

EEEK! Plumber coming this weekend! Stay tuned for big updates! 😀

Before I get there though – last week I started a very loose version of a Tiny Hot Water for Dummies guide, based on the premise that I, myself, am a dummy. Through my many hours of research and calling people and guessing and getting things wrong, I’ve now worked a few basics out and it only makes sense to share. Let us unite in our dumminess!

I must admit I didn’t research the solar hot water option as thoroughly as the hot water jackets or gas because from the get go it didn’t seem like the best option for my house.  Although it’s an environmentally friendly choice, I struggled to find good options that would suit an off-grid tiny set up. I’ll try for a quick overview, but if it’s something you’re seriously thinking about then I’d get in touch with some solar hot water suppliers and see what options there are.

On the whole, it seems there are two ways to think of solar hot water:

  1. Electric hot water powered by solar energy
  2. Solar hot water

Electric hot water is probably the least efficient option for heating water. It involves a storage tank that holds the water, while an electric element heats the water inside. Think, giant kettle. It’s a little more sophisticated and there are variations on the theme but that’s the gist of it. Generally speaking, using electricity to generate heat in any appliance (toaster, hair dryer, kettle, hot water service, etc) takes massive amounts of energy. Think about how much water you heat up when you’re making a coffee or tea, for example. Do you fill the kettle all the way up, or only put in enough for your cup? Apparently, the amount of energy used to boil excess water for one day could power all the street lights in England for one night. Ridiculous! You can get small electric systems and some people do choose to use them in a tiny house, but if you’re planning to use solar to power the electric element you’ll be looking at a very pricey set up.

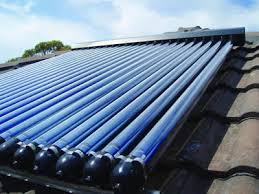
solarhotwater solarhotwater1

Solar hot water can be run without an electric element – either through evacuated tubes or a flat plate collector (images above). Things to keep in mind with solar hot water are:

  • You’ll need a storage tank and this is often mounted on the roof – they’re big and heavy. Not ideally suited to a tiny house with a small roof and weight restrictions.
  • I couldn’t find any systems that were designed to heat only a small amount of water. Most of them (including those pictured) are for standard homes and are pretty excessive if you’re only supplying one person in a tiny’s worth of hot water.
  • Most solar systems are combined with a gas or electric booster for when there isn’t enough power to meet all of your hot water needs. This means doubling up on heating systems and if you don’t have large hot water requirements then it just seems like extra money and work and resources for very little benefit. The amount of gas I’ll be using to heat all of my hot water is going to be pretty minimal and although I love the idea of not relying on gas, I think it’s best to pick your battles. Hot water just doesn’t seem to be one of the most effective ones to fight.

For more info on solar hot water systems jump on to the Aus government’s webpage, they have some useful starting points. It’s a brief overview I know, but there are bigger fish coming who will also need the frying. THE PLUMBER! Did I mention he’s coming this weekend? Happy Tiny Plumbing Christmas to meeee!

Big steps! 🙂

Toys! I mean, tools.

I’ve been collecting a few tools as I go, working out what I need that weekend and picking it up from Bunnings, mostly. You do need some basics to get started, but like with everything, until you know specifically what you need it’s a bit overwhelming to just think, ‘Right! I better get some tools.’

My purchases have gone in stages. Something a bit like this:

Stage one

  • Tool belt!

Even this was a hard choice, ha. How do you know how many holes for tools you’ll need when you don’t have any tools yet? And what shaped holes? And what material is best for the belt? In the end I went for something that looked vaguely sturdy but not very expensive in case I changed my mind. Now that I’ve spent a few months trying to shove tools in various holes and realising what would work better, I’d probably choose differently. But it’s a lesson you might have to just learn the hard way I think! This was a proud day nonetheless. I don’t think Tom was very impressed with the styling choice (pink tights) or lack of tools when I sent him this picture, but I was pretty chuffed.

img_8035

Stage two

  • Measuring tape
  • Stanley knife
  • Ear muffs
  • Builders pencil
  • Gloves

These probably don’t need much explaining, I use them every day now. Well, except the gloves. Either my hands are getting tougher or the work is less stabby, but I don’t seem to get cut up by bits of tin or splintered quite so often anymore.

Stage three

  • Square edge
  • Hammer
  • Clamp
  • Level
  • Tin snips
  • Drill and drill bits (actually I’ve managed to get away with borrowing Dad’s drill so far. Winning!)
  • Ladders – I also haven’t had to purchase one of these yet, lucky! If I was going to get one, I’d look at an extendable A frame one. They’re not cheap, but super handy.

Another month in and I was snipping flashings, screwing tin on and pre-drilling holes for rivets. It took me a little while to get the hang of the drill, there’s a few settings and instructions that are useful with these tricksters. Get someone who knows their stuff to step you through how to change bits and what settings do what. The level is handy for ruling lines as well, a nice long one makes it easier.

Stage four

  • Circular saw
  • Plane
  • Jigsaw
  • Caulk gun (I’ve also just borrowed Noel’s, but between the constant no-more-gapping and the liquid nails and the silicone and every other substance you can squeeze into a crack, they’re pretty priceless)
  • Paint brushes

img_9320-1

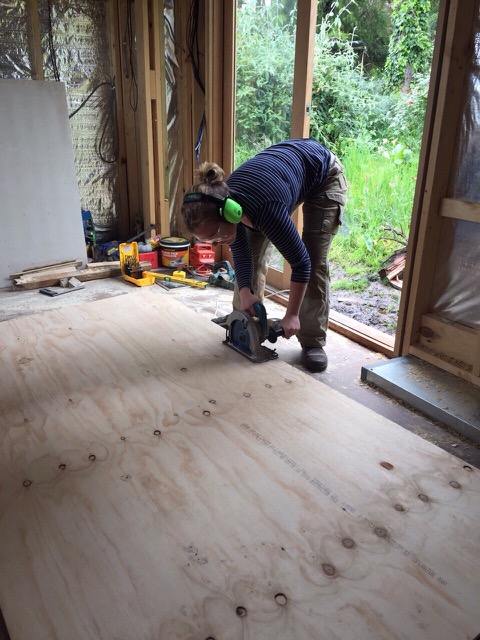
I was lucky enough to score some second hand tools from Tom at a bargain price, the circular saw and I are fast becoming best friends. I won’t say anything about my accuracy with straight lines – the damn things are hard enough to draw let alone cut! But I’m getting better. Something currently lacking from my shopping list that may well be a good investment is some kind of work bench – most of my measuring and cutting takes place on the floor at the moment. There is room outside to lay things on a work horse and cut when I need to, but the floor does help when I’m a pair of hands short for holding/catching offcuts etc. I should also note that all the tools I now have were complimented greatly by the huge stash of equipment Tom brought with him during the bulk of the build. One more excellent bonus of having some professional help! However, you can’t rely on someone else’s tools forever. There comes a time to bite the bullet and dive in the deep end. Also known as:

Stage five

  • Nail gun, baby!

img_9305

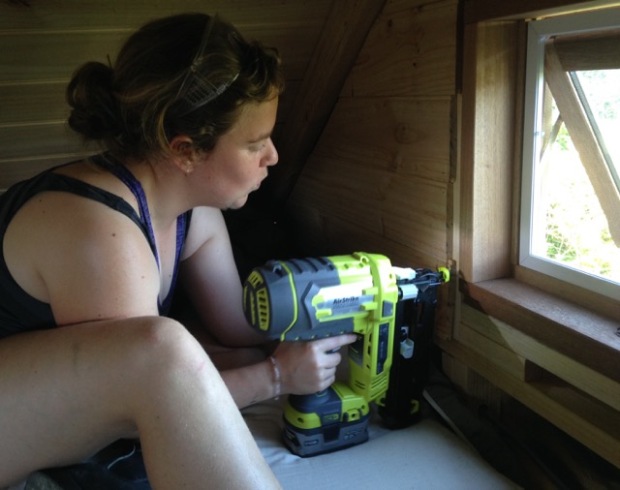
The benefit of this gun over others, for me at least, was the inbuilt air compressor. When you run power tools like a nun gun, stapler or anything that requires some kick, you can usually run them off an air compressor or gas canisters. The pressure from either of these forces air through the tools at such a rate that they can punch out whatever nail or material you’re using. Gas canisters are light weight and a convenient option, but you can burn through them pretty quickly and they’re not the cheapest or most efficient option if you’ve got lots to build. The compressor option makes sense…unless you can bypass it altogether by having it happen straight in the tool, right? This was the best choice for me at the moment anyway, I don’t have anything else to run on a compressor and the gun was a pretty decent price anyway so I went with it.

I do have the advantage of being able to borrow bits and bobs from Noel’s shed when I need to – if you’re reading this, THANKS NOEL! But for the most part, the above list has gotten me through the last month pretty well. A drop saw might be a handy addition, at times it would be nice not to have to worry quite so much about the straight lines and the fiddlyness of the circular saw, but I’m managing. I’m sure I’ll need more hand tools as things progress as well, but for now I’m feeling pretty well set up.

The best advice I have is to shop as you go and work out exactly what you need for each stage of the build. Going slowly gives you a good chance to get to know the tools as well and work out how best to use them. It’s still a work in progress for me, confidence with the tools is a big part of it too. Fake it till you make it, I say! At least I’ve got the pout sorted.

img_9331

Dummies Guide to: Hot Water Jackets

Now that my rainwater tank is set to be delivered I’ve had a few more choices to make. The first is hot water. Some of these posts may be super detailed but I’m basically writing what I wish I could’ve read when I had to make these decisions. So many blogs/websites/articles start by assuming you have a clue about this stuff.  I like my building instructions the way I like my directions, based on the premise that I have no idea what you’re talking about…or where I am. So here it is, the unofficial ‘Dummies Guide to Tiny House Hot Water.’

Chapter 1: Hot Water Jackets

Ok so firstly, a quick run down on what I WANTED to do, before I get into what I’ll actually be doing. Originally I wanted to heat my water using the wood fired stove through a hot water jacket – also known as a wetback, although apparently that’s an American (and also a racist) term. This pretty much involves water running through a coil inside the stove, and heating the water when the fire is going.

The cold water runs out the bottom of the tank, through the jacket on the heater, heats up and rises back to the storage tank, where it pushes the cold water back through the cycle.  Taadaa!

domestic_hot_water_elmira

There are much more thorough and competent explanations of them online than I could offer (including lovely pictures like this one), here’s a good starting point. So without going into much more detail than that, here’s the list of things that made me change my mind and decide not to get the hot water jacket. If you’ve thought of them all then you’re already way ahead of me.

  • One of the biggest barriers was cost. I thought it would be efficient to heat water from a system I already own and will be using, but I’m just not sure that’s true when it comes to set up cost. My stove to start with was $1600, and not all stoves are made for hot water. The jacket itself is close to $300 and needs to be installed by a plumber, who would’ve had to cut holes in my stove to retrofit it. A new storage tank was over $1000 and that’s not including a header tank for overflow or pressure regulation.
    (Special note here, it took me about 15 years to find out that’s how much the tanks cost because there are secret code words for all of these parts and projects and it’s a whole new magical language. You can’t just look up ‘hot water storage tank’ because you’ll find all sorts of electric water heaters and tanks and get nowhere near close to the right thing. What you actually want is an ‘Open Vented Low Pressure Wet Back Hot Water Heater Stove Cylinder – Non Electric‘. I’m not even joking, googling this stuff is an art form in itself.)
  • I briefly looked at repurposing an electric water heater (a storage tank with an electric element inside it) and just not plugging it in so it would stay just a tank. But electric systems aren’t vented, meaning they don’t have a way to release the pressure and overflow of the water that would build up using the hot water jacket (more info on vented vs unvented here).
  • Electric heaters are also not designed for the high temperatures of a wood fired stove. Here’s another magic code word: vitreous enamel. This is what you want your storage tanks to be made from in order to withstand the heat your stove will create. Copper is apparently an option too but I couldn’t find many of those on offer anymore.
  • Even if you’re have a small system like I’ll have and won’t require that much hot water, you need to have a large storage tank  – sorry, ‘Cylinder – Non Electric’. There has to be enough space and capacity for your hot water to cycle through and cool down in the tank before it goes back through the stove. Once your fire is set to go, there’s no stopping the heat from boiling up that water. Hence the open vented and low pressure cylinder – I’ve been told things can explode. Not ideal. A large tank is an expensive purchase and you need somewhere to put it. Somewhere above your stove, which means mounted on a wall somewhere. Space is precious in a tiny so that was a big cross!
  • Putting the coil in reduces room in the stove, meaning a smaller fire box and therefore a smaller heater. This sends less heat into the house and into the oven for cooking.
  • If you don’t want to have your fire burning all year round you’re going to need a back up option. I figured instant gas would be a cheap and easy option – kinda wrong there. The cheapest gas options I found that would fit the bill come in at upwards of $600. The back up system also gets tricky because hot water jackets can’t run off mains pressure – meaning that connecting them to town water like most houses are won’t work. Gas systems, however, usually need a decent minimum amount of pressure to work. So running between two systems can be complicated. It probably means using a water pump – more equipment and more money.

There are also, obviously, lots of good reasons to use a hot water jacket to heat your water. If you already have the stove, live in colder climate and have a big enough house and water system then it makes total sense to piggy back off a wood heater to also heat your water. I love the idea of it, but sadly it just doesn’t make financial or practical sense for me to bother right now.

I’ll go into more detail on the pumps and gas systems and what I’ve chosen as an alternative in future chapters. If this hasn’t quenched your thirst for knowledge, here’s a super detailed article on water systems I found helpful for a number of reasons.  But for now – happy plumbing, fellow dummies! xx

-End of Chapter 1- 

Tiles and taking punts

I mentioned my Nectre Baker’s Oven way back before I started building, this baby was my first purchase for the project. And now it’s inside!

img_9421-1

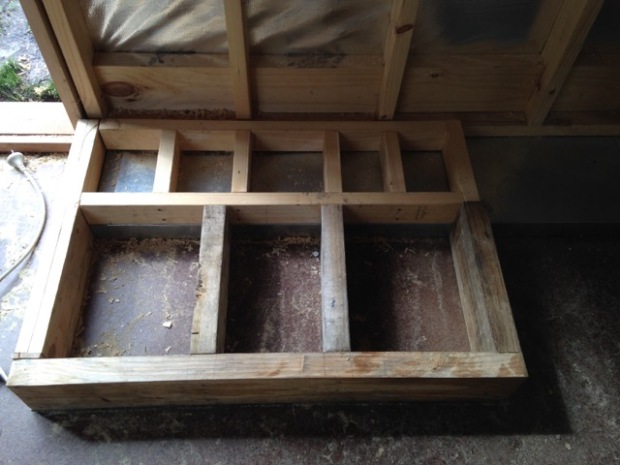
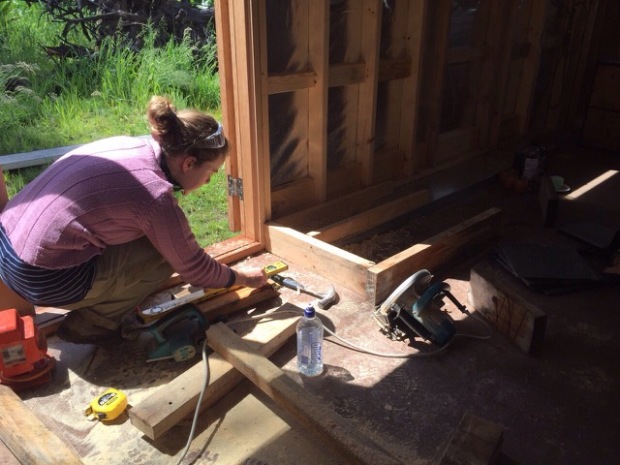
Getting here took some preparation and involved few new challenges, especially since I’m now flying solo. The position of my stove in the kitchen relies on it sitting over the wheel well, which meant I couldn’t just lay some tiles and sit the stove flat on the floor. The raised metal cover for my wheels meant building a frame over a split level foundation. For my first solo endeavour, this took some brain power. Luckily I had a back up brain – Brodes to the rescue once more. Together we formulated a box, made completely from scraps and offcuts.

img_9294

img_9318

Much maths. So thinking.

To heat proof the timber stand, I put two layers of cement sheeting down before laying tiles on top. Unfortunately, by this stage my supervision had left the building and it was up to some guess work and packet instructions to get the tiles on.

Here’s what I learnt about tiling:

  • Start with adhesive, mixed up like pancake mix and slathered on. Dad keeps telling me given the different thicknesses of the slate tiles I had, I should’ve lumped more adhesive on and bedded them down till they were even – more under the thin one and less under the thick. Easier said than done, I reckon.
  • The packet said to spread the adhesive using a spreader thingy – they look like a wide tooth comb. I started off all well and good but after a few combs in the same spot, my lovely neat rows became clumpy, poopy, stressful, not at all like the pictures, lumps of clag. I freaked slightly and whacked the tiles down quick smart, in case the adhesive was drying out. One tile in particular was thicker than the rest and didn’t seem to be sitting quite right, so I gave it a second round of adhesive and hoped it would do. Now that I’ve seen a few more pics I think one of my mistakes was combing in different directions. Straight lines one way, seems to be the way to go.
  • Speaking of – straight lines are a whole other thing. I used scrap pieces of timber between the tiles to keep them evenly spaced. You can buy spacers (they’re pretty small, starting at 1mm), but by adding cement sheeting to the sides of the hearth I’d increased the width of it and my spacers left a big gap either side. You can use whatever you like, just make sure you have something on hand (having said that, probably don’t listen to my advice. But it worked ok for me).
  • Grout – this came in massive tubs and seemed like overkill. I found a little premixed squeezie bottle of it and then basically pretended I was icing a hearth cake. Whenever I’ve found myself in this situation (out of my depth, doing something new), I relate it back to something familiar. Icing – I can do! Squeeze it out, smoosh it in, scrape it off, don’t lick fingers, not so hard. I kinda gave up trying to do it the right way in the end and just used my hands and some skinny scraps of timber I had laying around. The small gaps were the easiest, the big ones were harder to squish the grout into and crumbled a bit in the end.

img_9410

I’m pretty sure there’s a proper way to tile and I’m not sure the above instructions cover it, but I’m worrying less about right and wrong and more about finding something that works. Common sense and youtube will get you so far, but without someone else’s experience to rely on now some of it is just going to require taking a punt.

I think I took for granted the emotional support that comes from letting someone else deal with problems when they crop up. I took for granted the implicit trust in Tom to find a solution for tricky situations when they arose – because he always did. After the first two days of going it alone, I was exhausted. Not depleted, but physically and emotionally worn out. And I can’t even say I was working alone for those days! I’ve had family and friends floating around, chipping in and lending extra pairs of hands here and there. But being the one who has to decide, who has to actually bear the brunt of the work being done and who has to think through every step, it’s tiring. It’s what I’ve been waiting for, don’t get me wrong. Every step is that much more rewarding when you’ve had to figure out every inch, or in my case, millimetre of it.

Can’t you tell, from these smiles? Stupidly excited by a small win.

img_9319

Things are moving more slowly and I’m still lacking lots of tools and knowledge that I’ll need. But each step forward leads to another one, I’m counting on that snowball effect kicking in again soon. I’m collecting more tools, getting better at giving it a go and fixing things that don’t work. That’s gotta be most of it, right?

Lots of updates still to come on the big things like plumbing and electricity, things are falling into place now. Just in time to get some important bits in place before Christmas hopefully!

Tiny Pets

I do have some actual building updates, but my brain is pretty fried tonight and I’m not sure where to start. So…here are some pictures of furry friends instead!

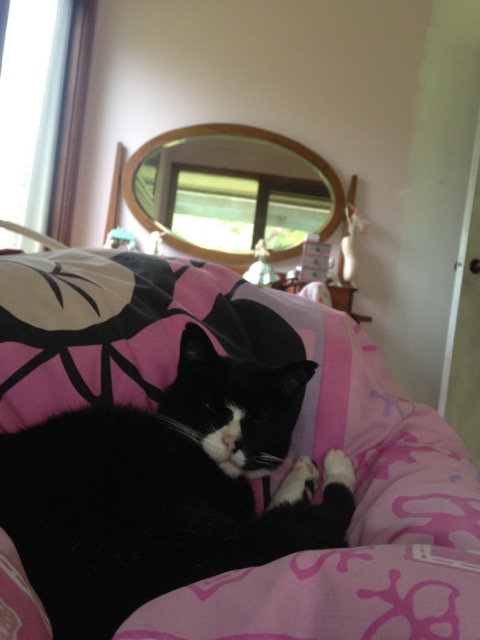
img_9400

Mac the cat came for morning cuddles – not strictly in my tiny house cos I was cheating and sleeping in my niece’s bed, but sometimes you just need a real bed.

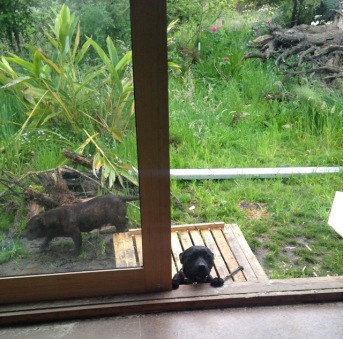
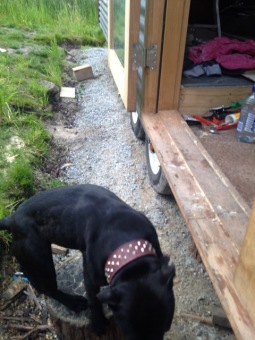
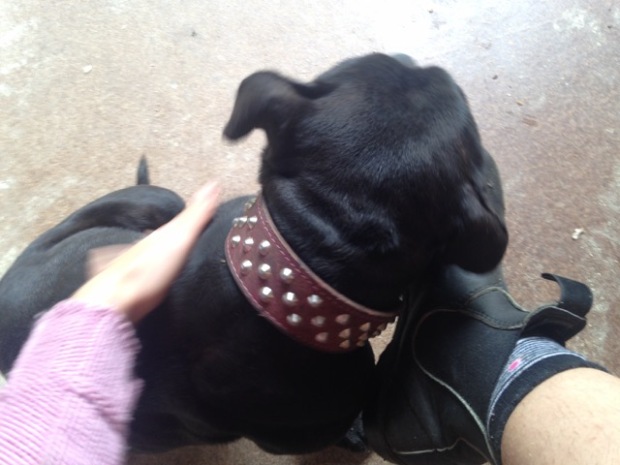
This gorgeous pup came down from next door for a visit and was clearly in the mood for a cuddle too! It took her a while to figure out the makeshift step but she was very happy to clean up my breakfast scraps once she did.

img_9355      img_9356

img_9367

Squee! xx