Going off grid part 1: Water

When I was first planning this I hadn’t nutted out all the details (or any of them) and figured I could run off an extension lead and the garden hose if it really came down to it.  To start with I’d set myself a minimal budget, figuring that if I was going at this alone there was a pretty good chance I was going to end up with something not unlike a shoddy cubby house. And trust me, I’ve built plenty of those in my lifetime – shoddy being the very operable word.

I based my budget and the guess of how much I’d be able to manage on other people’s experiences, I didn’t have any other framework to go on. I’ve never built anything before (one wooden pencil box in high school and many shoddy cubby houses aside) and it seems I’ve effectively avoided buying any house related goods, pretty much, well…ever. I had no clue what I was in for. In case this blog has not already informed you of that fact.

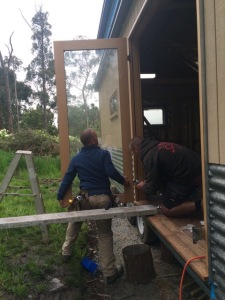
Thankfully, I had a Tom. Suddenly, the quality of what we were building felt like something worth spending my money on. It felt less like a gamble. Well, no, not true. The whole thing still most days feels like a total gamble. But now, on the cusp of having something beautiful, something worthy of the belief that got me to the starting line in the first place, it seems silly to skimp or not go the extra mile. This is where things get serious. Do I really want to go down the easy road and run off a cord and hose from my sister’s house? It certainly seems like a quick, cheap option. Setting this tiny up to run off grid would be expensive, a steep learning curve, and yet perhaps the only way to really walk the talk in this project.

So: off grid options mean I’m looking a rainwater tank, composting toilet, solar power and a home made grey water system, to start with at least. The power, plumbing and technical elements of the house have been swamping my brain, night after night, for a few months now. I want to document as much of it as I can – firstly so I don’t forget it all as soon as I move on to the next step, and secondly because it might be useful to anyone else out there starting from scratch.

Baby steps this week include: I bit the bullet and ordered my rainwater tank! Who knew these things were so expensive? Sigh. If you’re not sick of me saying that yet, don’t worry, you soon will be. I didn’t know! I guess that’s who. I haven’t really chosen the cheapest options for many parts of this build, so I’m sure there are ways to cut costs. But someone (or a few people) said to me right at the start of this: you either have money, or you have time. Second hand, budget and do-it-yourself- options are all well and good if you have time to scour every shop, every supplier, every scrap yard. If you only have a day and a half each weekend to actually get something done and you need your materials good to go and made to fit, then you’re going to fork out a little extra, simple as that.

I found a tank supplier that makes slimline tanks, a nice oval shape that I’ll be able to mount on the front of my trailer. They were flexible in the dimensions and make the tanks out of colourbond steel, plus I get free delivery! Tanks smaller than 1,000 litres seem less common so options were also limited by my choice to go for less. Originally I was thinking something tiny, maybe a 200 litre tank. I’m not sure why, it was just the first size that popped into my head. Plus, 200 litres sounds like a decent amount, right? Well it did, until I had a look at some of the figures that make up average daily water usage.

Melbourne metropolitan water usage in 2011-2012 clocked up at each person averaging 149 litres of water per day. Tell me that doesn’t boggle your mind a little. Imagine trying to carry that much water. Or drink that. Or even imagine what size container you’d need to hold it! I’m sorry, my mind is boggled. That seems pretty ridiculous.

Showers use around 8 litres a minute, average shower length is 6 minutes (40 litres). Average flushes of a loo per person per day is 3 and even using the most efficient toilets and using the half flush, it’s 3 litres a pop (9 litres). Add to this washing hands, washing dishes, whatever you cook and drink with…it adds up! Fortunately, I don’t have a laundry to consider and the compost toilet will be discussed later. But if I’m anywhere near that kind of usage, 200 litres isn’t going very far. In the end, based on practicality and price, 600 litres seemed like a safe enough bet. If I’m using 40 litres a day, I’ll be able to last two weeks with no rain. That’s not a lot when you think about an Australian summer. Certainly changes the way you think about things, if you have to ration your resources out and can’t rely on what often seems like infinite access to whatever we want – power, water, food, you name it! Giving up convenience is a daunting thought when it’s been so hardwired into our lives.

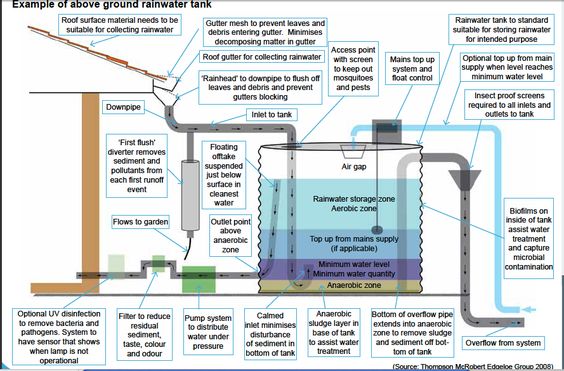
When I placed the order, I had to specify where I wanted inlets, outlets and overflows positioned – not something I’d thought about but fairly common sense. A bit of research never hurts to see how other people do it. In case you’ve ever wondered, here’s more info than you probably want on what happens inside a rainwater tank:

bb0a6a06340381626ebed9078476040c

So much of our current lifestyles are unsustainable. We continue to flush clean, drinkable water away as waste, while people all around the world struggle to access any water at all. Girls in so many countries miss out on getting an education or employment, face dangerous conditions and walk unthinkable distances to supply their family with water. Here I am complaining about the privilege of spending money to connect running water to my house, when it’s a total gift to even have that choice. So, so lucky.

On a less serious note, that water report has made me a bit curious I must admit. Is it weird if I start keeping a tally of how many flushes I get through in a day? How many litres do you think you’d use on an average day?

Chapter Two.

Here’s what lock up brought: the chance to spend a night in the tiny, sealed in and safe from the elements. It’s still more or less camping, don’t get me wrong. But with all of the cladding on, most of the eaves tucked in and the house essentially water tight, it was safe to bring in some bedding and take the plunge.

img_9259

Fi Khubs Nanachub – one of my nearest and dearest – happened to be in town and shared the metaphoric crossing of the threshold, shifting this project from the building of a house to the making of a home.  I don’t have any power yet, so candles (brave, or just stupid?) and solar powered lanterns got us through an atmospheric and relaxed evening.

img_9267

I’ve since upgraded to fairy lights and an LED strip light powered from a battery (on loan from the ever resourceful Noel). Between all these options and a head torch I have more than enough to light my way. Since Fi and I stayed that first night, I’ve slept over every chance I’ve had. I was worried that I’d be cold up there without any insulation in my walls and no wood heater installed yet, but so far it has been more than cosy enough! It is a bit of a worry that the spring time sun manages to shine straight onto my face through the east facing window and wake me up with its heat and light already, in October. It’s possible that my faith in the double glazed glass may have been slightly over done, some curtains may be required later in the year. Either that or Saree may finally become an early riser! Never too late to learn, right? 😛

The evening light isn’t too shabby either – here’s the view from my pillow tonight.

img_9314

I made a detour to collect some old tea boxes on the weekend too. I’m not sure exactly what I’ll be able to use them for just yet but they were too special to pass up. I’m hoping I can work them into my stairs somehow – maybe if I build the frame first then find a way to include these as a storage option? Either way, they’re working well as make shift tables for now. Gotta have somewhere nice to put fancy housewarming flowers from the farmers markets 😉

img_9239   img_9240

I’m feeling inspired at the moment by this rustic collection of crates and pallets from Tiny House Giant Journey. I like that it’s not so obviously a staircase, but still functions as one. Clever!

1f25efad046d1cb549376a6a70941e33

Having said that, there’s still plenty of work to do before I get to the stairs. And so far I haven’t been lured into the temptation of a mid work day nap, despite having a bed available. Winning! It certainly makes the weekends a little less tedious, not having to pack up at the end of the day and head back to my parents’ place, just to turn back around the next day.

It also makes it feel a little bit more real. Waking up and realising – that sound of birds chattering in the morning, the view belting down on my head and lulling me to sleep each night, the smell of pine and cypress – every decision so far that has led me to this point, is mine.

Thanks for the visit Khubsee! Your Nan’s yoyos got me through a tough day building. Next time you’re down hopefully I’ll be set up enough to make us an inhouse cup of tea for breakfast! 😉 xx

The ‘L’ word

Some things sneak up on you without noticing, even though it feels like you’ve been waiting a lifetime for them to arrive. Last weekend, quietly and without ceremony, the final pieces of cladding went onto the dormer window and my tiny was sealed up and suddenly secure from the elements.

img_9207

This is it. This is what lock up looks like. It’s hard to think back to July, only 3 months ago, when I was feeling frustrated at the lack of momentum and inability to just get started. I’m not even sure I knew what ‘lock up’ meant back then! Is it ridiculous to be feeling nostalgic about a project that I’m not even halfway through yet? Either way, it’s a pretty special feeling – to look at this creation and know that it’s mine, that soon it will be my home.

There are a few final details to go to finish the outside of the tiny: eave boards underneath the overhangs, guttering on the front gable, the timber architraves (trim) around the windows and door and plenty more paint!

img_9160

img_9171

The timber architraves are going to make a world of difference. I had imagined something a bit more rustic, a bit more rough and ready, maybe like old silver farm fence palings. Once again, finding time to hunt down these kind of second hand resources is tricky. I’m sure they’re out there, but working full time and having professionals come to help out mean materials need to be ready to go with little time for foraging. Instead, Tom grabbed a 75 x 125mm cypress sleeper from the hardware shop and stripped it down to fit around window frames. This took a bit of wrangling, given how far out they sit from the cladding (obviously designed for a brick house or something with much thicker walls). The architraves were checked out to sit right over the edge of the window frame, also covering up the flashing that ran around the sides.

Turned out pretty nicely, don’t you think??

img_9162

Tomorrow should finish off the outside and will also be a momentous occasion – the first sleep over in the tiny! It will be glorified camping at this stage, but a pretty big deal nonetheless.

After that a whole new chapter awaits…the inside! I’m grateful that I’m still loving every tiny moment, cos there’s still a long way to go. I guess there’s lots of L words in the end. L is for lock up, for loving this project that has taken over since I took the plunge to make it happen, and the new life that is taking shape around this tiny home.

Deep Sea Diving

After realising some of the challenges involved in getting cladding up on the dormers, it made sense to try and get each side finished all at once, while the scaffolding/ladders were set up. This meant cladded, trimmed and painted. Painted! Meaning it was Saturday morning, Tom was on his way and it was time to choose a paint colour for my tiny!
There’s a bit of a back story behind the Blue Saree thing, but I’ll save that for another day. Enough to say that blue was always going to be the colour of my house, and I had some idea of the look I was going for when I started this project. As it turns out, translating something in your head into real life, especially when deadlines are involved, is another matter altogether. Brodie, lifesaver that she is, came with me to Bunnings and trawled through the paint section, assessing potential combinations and ideas for painting the tiny. We narrowed down the options and took two samples home. I’m not sure whether this was a genius move (limiting options) or just a bit short sighted, thinking that two options would be enough. Either way, I took home Costa Rica blue and Colourbond Deep Ocean.
img_9087
The blue was very blue! The Deep Ocean was a little more grey than I originally had in mind, but next to the colour of my Ironstone roof, it seemed just about right. I went with the one on the right. Once the big decision was made, it was just time to get cracking. Tom worked on putting the cladding up on the North facing dormer and before we knew it the moment had arrived – time for the first lick of paint!
img_9142   img_9128
Brods lacquered up the weather stops and the rosy cedar compliments the blue and tin so well. Better than the deep ocean compliments my pasty legs at least. Big shout out to my tiny buddy Nicole here for the lend of her boots – although the warmer Spring weather is slow in approaching, the snow boots I’ve been wearing up until now are definitely becoming excessive.
img_9127
Plenty of people asked about windows on this North facing dormer  – as you can see there aren’t any. I had originally thought about having windows on all three sides of the loft, but when it came down to price of windows, wall storage and practically, it just didn’t happen. I’m not sure whether I’d make the same decision again, but so far I don’t regret it. It’s working! And I’ll need somewhere to put some clothes up in the loft – that wall might be my best bet.
img_9130
There’s still another day’s work on the South facing dormer (the one with the window!) and plenty more painting to come. Feels like lots of progress though!

Snowballing

It feels like things just keep picking up at the moment, this tiny is taking on a life of its own!

Better weather, longer days, a bit more confidence and more practice spending money, lots of helping hands and a few extra professionals stepping in – all add up to lots of progress.

City slicker Tiaan came down to spend the img_9015
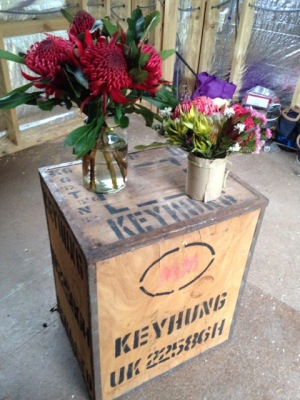
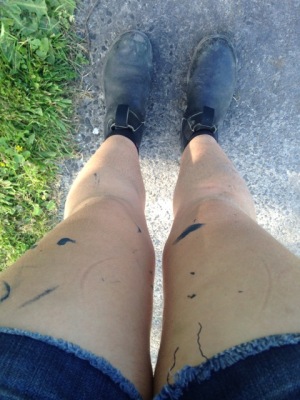
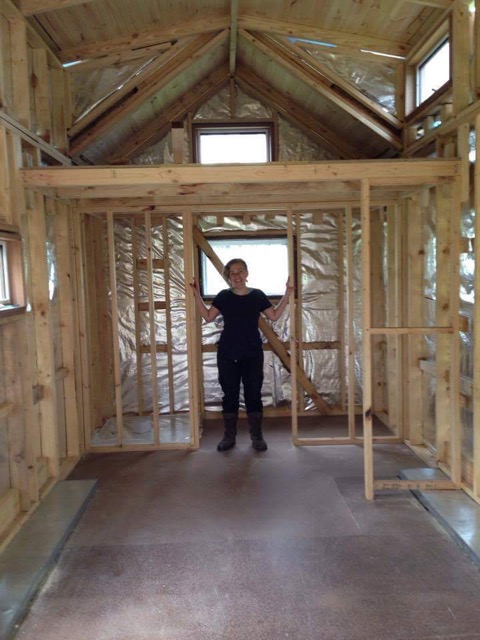
weekend helping and what more can you ask for, than someone willing to get out of their comfort zone? I met Tiaan last year in Canada and we barely spent three days hanging out before I jetted off and we didn’t see each other for well over 12 months. Despite being opposites in most aspects of life, when you find your people, distance or differences don’t matter much. Tiaan swears her shoe collection wouldn’t fit in my tiny and has no interest in living in the country, but here’s proof for your Mum, Tiaan, you definitely got your hands dirty! Thank you!

We shopped for a shower base, removed the last of the bracing, cleaned out all the scraps and tidied the tiny for the first time properly – such a change! The space feels completely different…so homey! EEK!

img_9037

img_9039

We also spent some time battling with a few odd jobs left between proper building days with Tom – back to my best friend, flashing! This lot is to neaten up the rough edges of the corrugated iron and also hopefully stop any water getting in the sides. It was hard work on the hands, I had to tin snip all of the pieces to fit, then drill the holes through the flashing and the tin and then the rivets went in. Soft, weak non-tradie hands are not really an asset at this point in life, but I’m sure they’re getting stronger (or possibly I’m just getting more stubborn, not sure which).

I’m loath to admit how long it took me to get these ten pieces of flashing on, but the point is that THEY’RE ON! Once I worked out how to tighten the chuck on the drill enough to hold the drill bits properly I made much better progress. If you ever come to see my tiny in real life and feel compelled to comment on the excellent quality of the flashings around the edges, rest assured you’ll go straight to the pool room.

img_9022      img_9024

But probably (most certainly) the most exciting update though is that I have a door! Two doors, in fact! Two beautiful, expertly hung doors, thanks to these legends, Ferg and Noel.

img_9063     img_9065

img_9074

Taaddaaaa! The doors are cedar, double glazed (and not light!), outward opening and definitely a highlight of the house! They weren’t cheap (new but second hand for $1000) but I opted for quality over…well not quality. And I love them! Lots of light, they feel secure and will hopefully do well keeping the heat/cool in/out so I won’t need curtains or to worry about covering them. There was a bit of thinking around the hinges, I bought some cheap parliament hinges from Bunnings but they were more like gate hinges and would’ve stuck out a mile. Fergus found some much nicer stainless steel butterfly hinges that still allow the doors to rotate a full 180 degrees so I’ll be able to open them fully. Woohoo!

I’m not thinking too much about weight distribution or keeping very good track of the weight that’s going on my trailer at the moment. I don’t even have a clear idea of how much the doors weigh, but I suppose worst case I could take them off if I needed to move it. Right now though I’m pretty darn chuffed with them, right where they are.

Bring. on. lock. up!